The Paldea region in Pokémon Scarlet & Violet is massive and filled with all kinds of Pokémon and landmarks, and we can imagine you’ll want to snap a few pictures of your adventures whilst you explore. Luckily, Pokémon Scarlet and Violet have a nifty camera app to snap all the images you want, whether group photos with friends or a snap of your favorite partner Pokémon.
Below, players can learn how to snap pictures on the go – a particularly important skill if you are playing through The Indigo Disk and searching for Meloetta.
Related: How to toggle following Pokémon in Pokémon Scarlet and Violet
How to Get The Camera in Pokemon Scarlet and Violet
In the game’s opening minutes, you receive your Rotom Phone from your mom before setting off into the big wide world of the Paldea region. This new phone includes a camera you can use to snap pictures of yourself, wandering Pokémon or a group shot with some friends.
How to Use The Rotom Phone in Pokemon Scarlet and Violet

To use the camera, you simply press Down on the D-pad, and the camera app will open, ready for you to use.
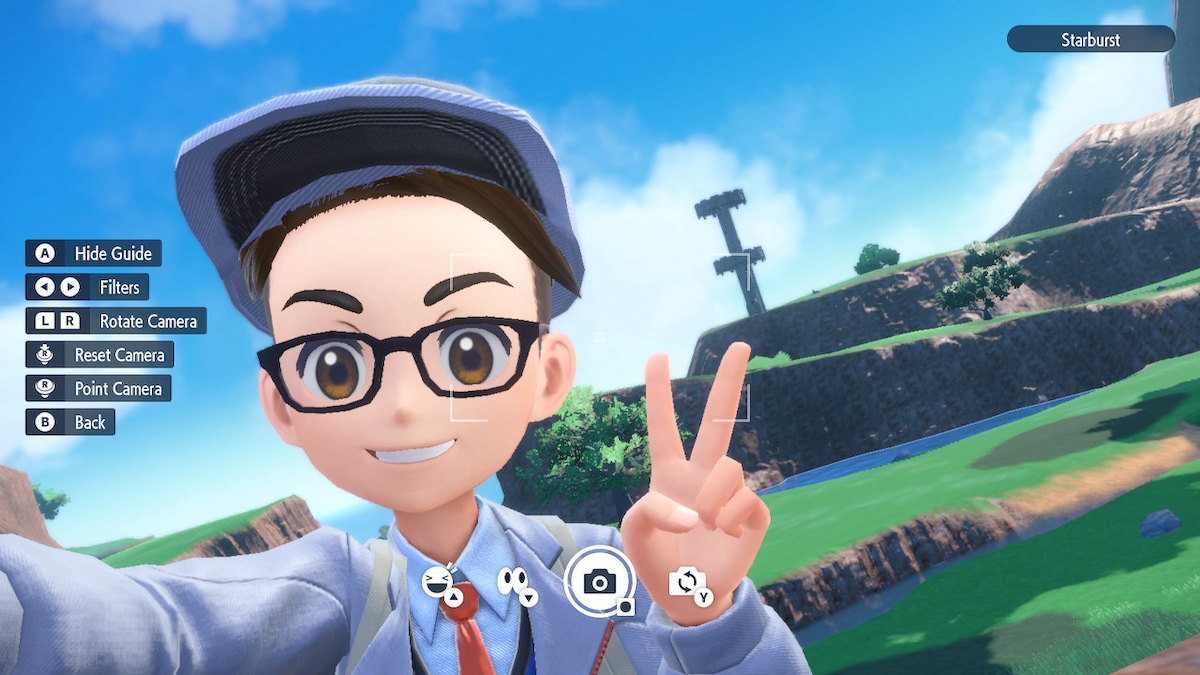
By default, the camera will be in first-person, aiming in front of you so you can snap a picture of a landscape or particular Pokémon, and you can use the Left Stick to move the camera around and frame up your shot. If you want to get a selfie of yourself with your buddies or favorite Pokémon, Press the Y Button, and the camera will flip around to get your character in the shot.
Filters and Poses in Pokemon Scarlet and Violet
There is a selection of Filters you and apply to your camera, such as blur, retro, and a fish-eye lens, to name a few. You can also make your character pose and emote by pressing Up on the D-pad while in selfie mode, showing you a selection of poses and emotes like the peace hand gesture or a wave. If you want to take a picture at an angle, you can press the L and R Triggers, and to reset the camera back to the default settings, press the Right Stick.
Once you are happy with your picture, press the A button to hide the guide to the left of the screen that shows you the controls, and snap a picture with the screenshot button, this is the small black square button found at the bottom of the left Joy-Con. Now you are ready to become a Pokémon photographer and start snapping pictures of your adventures.


Published: Jan 5, 2024 11:51 pm