
You can make a wide array of Loadouts while playing Destiny 2. These have multiple saved items that you can quickly switch to while playing your character, rather than individually picking every item in your inventory and sorting through them. This should make it easier to swap weapons and armor mods that complement these choices. Here’s what you need to know about how to create a Loadout in Destiny 2.
How loadouts work in Destiny 2
You can find the loadout screen on the far left of your Character page. You’ll have six slots to start with, and you unlock additional ones as you progress through the Guardian Ranks, unlocking more as you play the game. Each slot will have a predetermined name; you can preview that loadout as you hover over it.
Related: All Strand keywords in Destiny 2
When you want to save a loadout, equip the weapons, gear, and armor mods for the equipment you want to utilize for that character. After you’ve done this, go to the Loadout page, choose the slot you want to place it in, and click on it to save your current weapons. All the weapons, armor, and mods will be available when you switch to that loadout, allowing you to use it immediately.
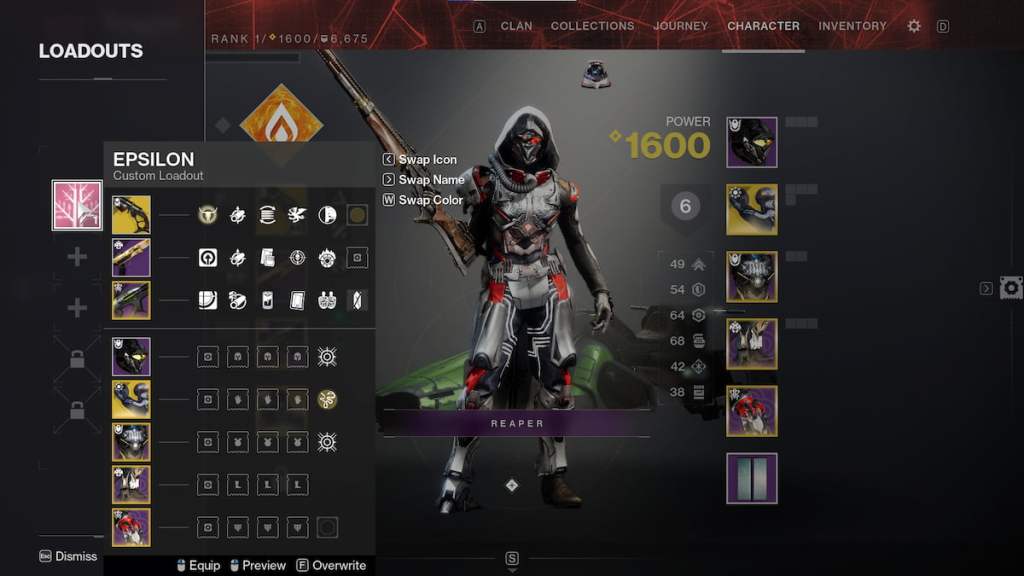
If you want to overwrite an already created loadout, make the modifications you wish to utilize, and then click the “Overwrite” option when hovering over one of the loadout slots. This will update that page with the new armor and equipment you’ll want to utilize, and it should have the same loadout name and icon you were already using.
We recommend switching it up for every loadout slot and utilizing the vast array of weapons and armor modes you’ll regularly use for the many raids, dungeons, and upcoming Nightfalls set to release in Destiny 2.

Published: Feb 28, 2023 11:18 am