It is possible to connect your old GameCube Controller with Nintendo Switch – all you need is the controller, Nintendo Switch, and an external USB Adapter.
The Nintendo Switch has allowed gamers to use the older GameCube controller when it released the 4.0 Software Update. However, the process to Connect and Use it is not that simple, you have to do few changes to settings. In this guide, we have listed the steps you need to follow to Connect GameCube Controller with Nintendo Switch.
I would advise you to use GameCube controller with Nintendo Switch when you are playing games like Mario Kart or Sonic Mania, don’t use it when you are playing games like The Legend of Zelda: Breath of the Wild.
Connect GameCube Controller To Nintendo Switch
Requirement: To connect GameCube Controller to Nintendo Switch, a USB GameCube Controller Adapter. You can go to Amazon and search for it – most of them are available for $20 or so. Pick anyone.
Step 1: Connect your GameCube controller to the adapter. Connect the USB port of the Adapter to the Nintendo Switch Dock.
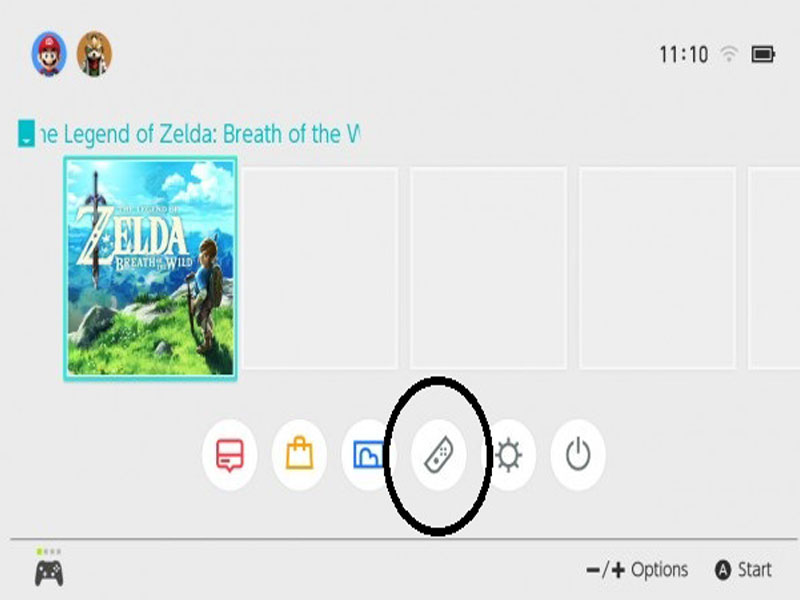
Step 2: Go to the Controller Settings from the Home Screen.
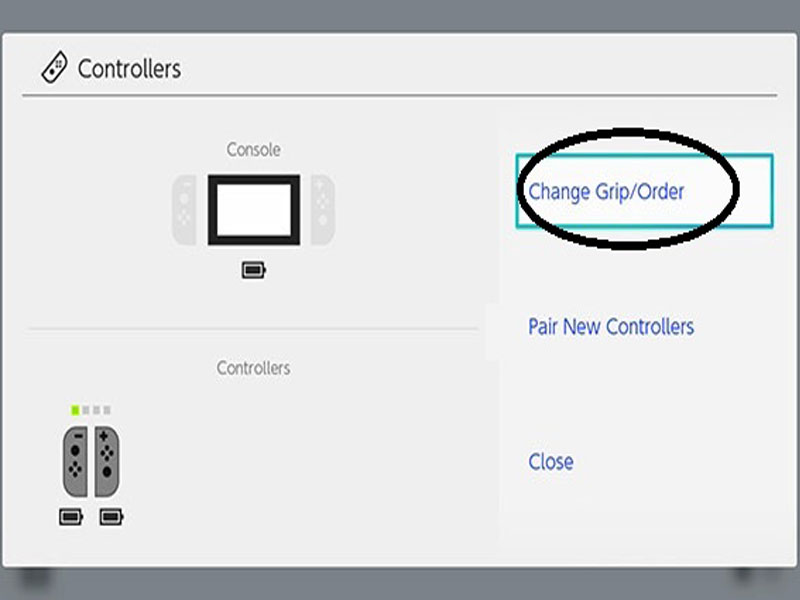
Step 3: Select “Change Grip” Option.
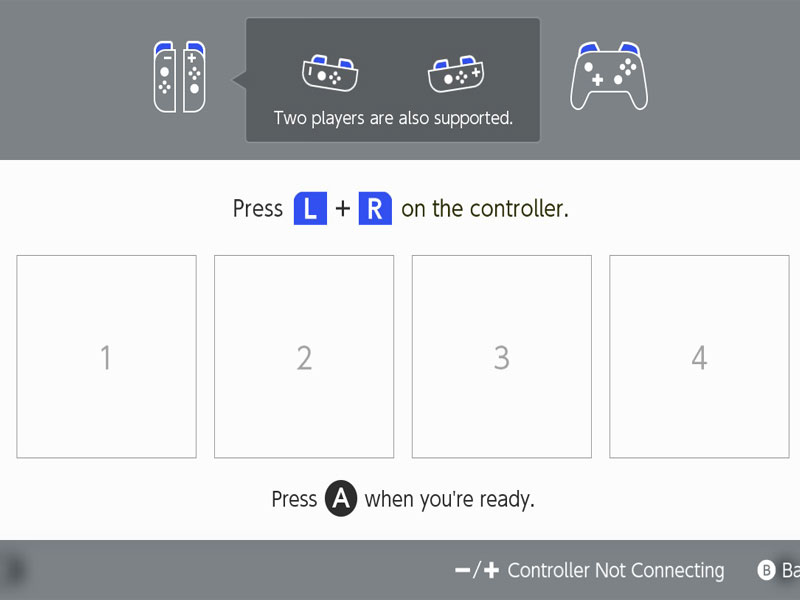
Step 4: Press L and R on the GameCube Controller like you would from your Joy-Con Controller
Step 5: You GameCube controller will show up as a USB controller.
Note: With the GameCube Controller you can play most of the Switch games that are compatible with a Pro Controller. The GameCube doesn’t support motion or rumble on the Nintendo Switch.


Published: Aug 13, 2018 12:50 pm