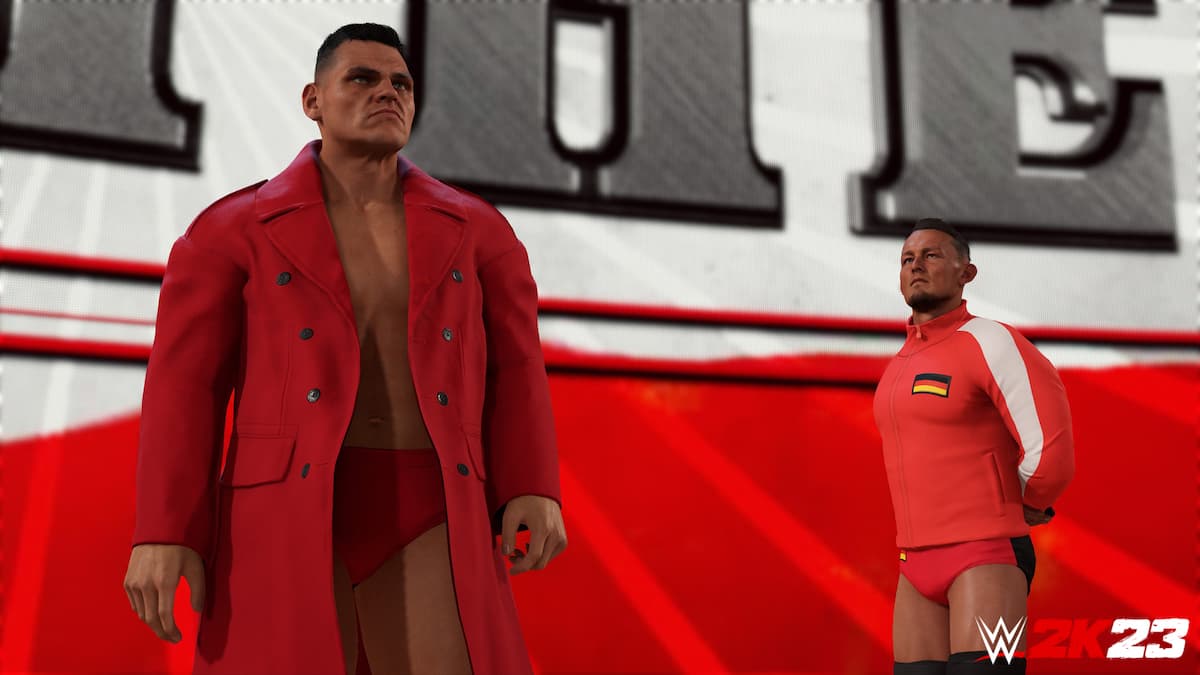
Like in prior WWE 2K games, users can get creative and create custom attires for both existing and created wrestlers in WWE 2K23. Not to mention, players can make special alternate attires through the Creation Suite in order to make attires not in the game. But how can you change attires in 2K23 in order to use them in-game? This guide explains the steps to change attires that WWE 2K23 players should know.
Related: WWE 2K23: John Cena 2K Showcase – How to complete all objectives
WWE 2K23 attires guide | How to change attires and make custom attires
First off, any custom attires must be managed through the Creations section. Whether it be one you downloaded through the game’s Community Creations suite, or one made by yourself, remember that custom attires for existing WWE superstars and CAWs (create-a-wrestler) can be managed via the ‘Superstar’ tab in the Creations section of the main menu.
Here, make sure that an attire is set as an alternate. Select a superstar, and then go through the attire options and slots. Once it is, it can then be used as a useable attire in WWE 2K23.
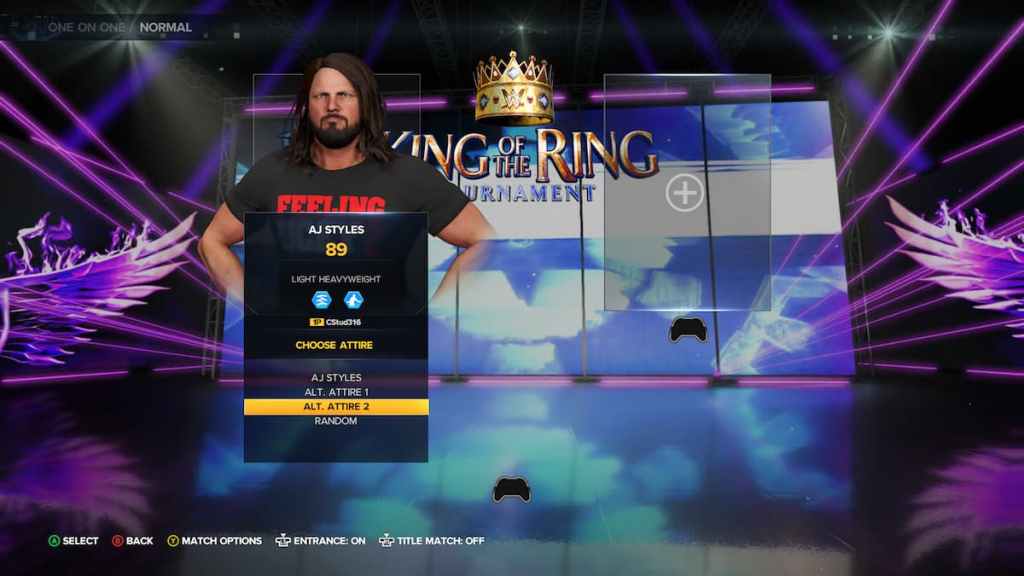
After that, head to the Quick Menu for those who are looking to do a quick match. If you have an attire set as an alternate, it should show up here as ‘Alt. Attire X.’
Alternatively, players can set alternate attires as default attires by going to the Main Menu. From there, go to ‘Options.’ Once you do that, select ‘Roster’ to go through the list of playable wrestlers. Each wrestler’s bio has an ‘Attire’ setting. Pick one attire to set it as the default.
That is virtually all the steps that are required for the use of alternate attires in WWE 2K23. Make sure, though, to understand how to control the defaults.


Published: Mar 13, 2023 06:15 am