Bethesda launcher shutting down – how to transfer your games to Steam
The Bethesda.net launcher is being shut down. Here’s how to transfer your games and save files to Steam.

Image via Bethesda
Bethesda announced in February this year that they would be sunsetting the Bethesda launcher. This comes after Microsoft acquired Bethesda in March 2021. During the acquisition, Microsoft promised more Xbox and PC exclusives. It seems as though they are bringing the community closer together by removing the Bethesda.net launcher. PC players seem to be split in their opinions. According to some of the replies on the original Bethesda announcement tweet, some are saying it’s a “big thing.” Others welcome the change, saying it’s “a pointless launcher.” Regardless of your opinion, the launcher is being discontinued on May 11.
Players who have games on the Bethesda.net launcher will need to transfer them to Steam. This process can now be done so you’re ready for the sunset on May 11. All the games you currently own will be available on Steam, including game process, save files, in-game currency, skins, and other game-ons. Read on to find out more on how to transfer.
Step 1. Log into Bethesda.net
To complete any of the transfer steps, you’ll need to log into your Bethesda.net account. Once you’ve logged in, head to the Transfer Library page. You can do this by clicking the link here or clicking your account picture in the top right-hand corner and selecting “Transfer Library” from the dropdown.
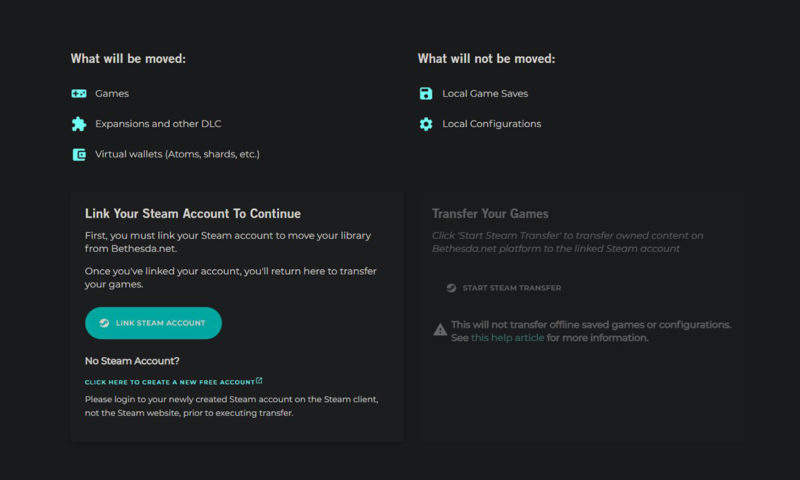
Step 2. Link your Steam account
Next, you’ll need to link your Steam account. When you have your Steam account details ready, click “Link Steam Account” in the middle of the page.
Once you’ve clicked the link, a new page will be opened. Select your Steam account if it’s already shown. If not shown, click the “+” symbol to link your account.
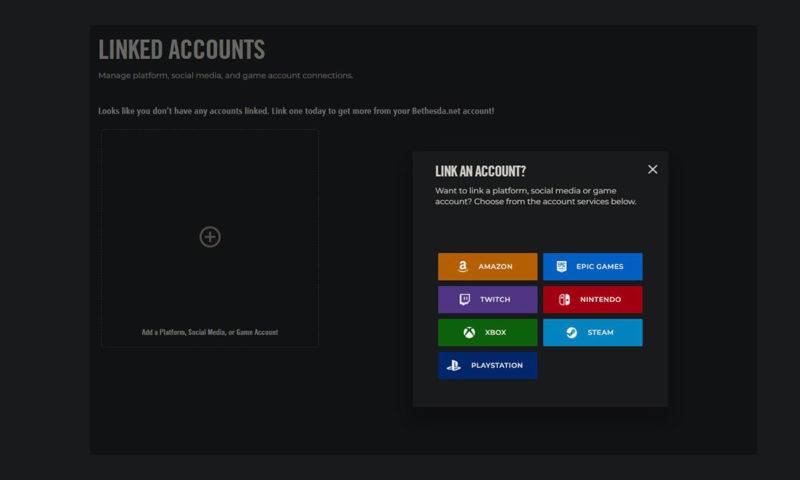
Enter your Steam details and follow any prompts. If your connection is successful, you’ll receive a confirmation, and your Steam account should now be visible.

If you don’t have a Steam account, you’ll need to create one. It’s free to have a Steam account.
Step 3. Transfer Library
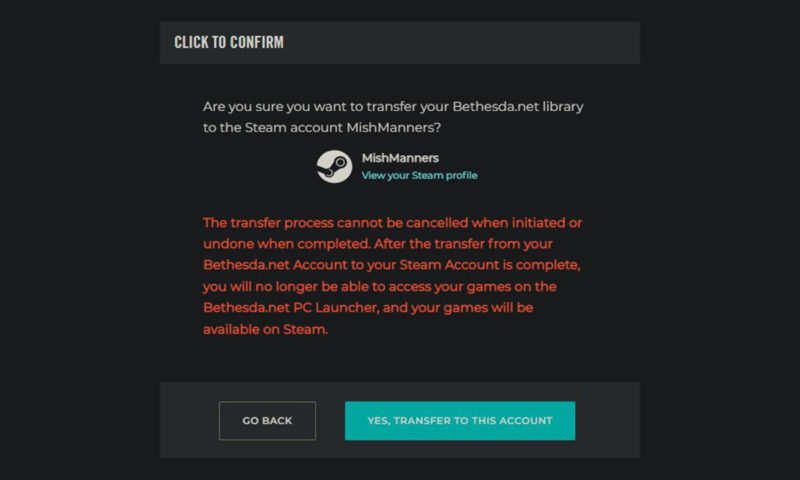
Now that your Steam account is successfully linked, head back to the “Transfer Library” page. You should now see that your Steam account is linked. Make sure it has the correct details. Make sure you have the correct Steam account details. Once you’ve started the transfer process, it can’t be stopped. If you have the incorrect information, you’ll be transferring your games to the wrong account.
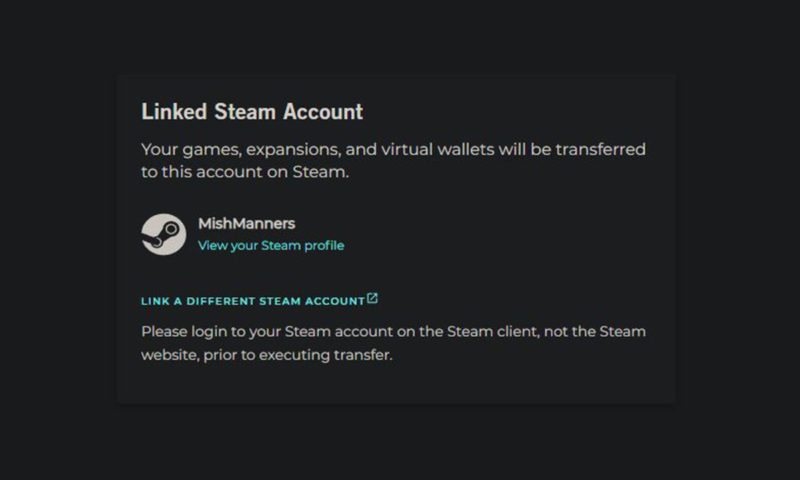
If this is correct, proceed to the next step. If not, click “LINK A DIFFERENT STEAM ACCOUNT” and select to transfer to a different Steam account, or follow Step 2 to add another Steam account to your profile.
Step 4. Transfer Games
As long as you have the correct Steam account, you can click “Start Steam Transfer.” Remember, once this process has started, you can’t change it. So make sure you have the correct Steam details. You’ll also notice that game saves and local configurations won’t be transferred over. Don’t worry; we’ll do this in the next step.
If you’re ready, click to confirm the transfer process.
Note that Elder Scrolls Online is not included in this list. ESO uses its own launcher and not Bethesda.net. Players can still log into ESO using Steam or the Elder Scrolls Online launcher.
Step 5. Transfer complete
The process should take a few minutes, depending on how many games you have in your account. Once the transfer is complete, a confirmation will appear, along with a record of the content that was transferred.
Step 6. Transfer save files
Now that your games are transferred to Steam, you’ll need to transfer the saved files. Some saved files will be automatically transferred over. Most, however, will need to be manually copied into the Steam save folder on your computer. Each game is slightly different. If you’re logged into the Bethesda.net website, you can find specific instructions on all games and how to transfer their saved files to the new Steam folder.
The only exceptions are Wolfenstein: Youngblood, which unfortunately is not able to transfer any saved files. DOOM Eternal also requires some additional steps to transfer files.
Using Steam
Now that everything has been transferred over, you’ll be able to play all your favorite Bethesda games direct from Steam. Make sure you copy over the save files and ensure you have the correct Steam account for everything to work smoothly.