Seraph Warsat Network quest guide – Destiny 2
Strap in for a long, grindy quest.
After activating the Seraph Bunker in the EDZ zone, Ana needs your help reestablishing its defenses. You need to increase the levels of the bunker, and to do this, you need to collect warmind bits by doing bounties for the bunker all around the galaxy. You want to turn in these warmind bits into chipsets, thereby upgrading the bunker.
Step 1 – Input/Output
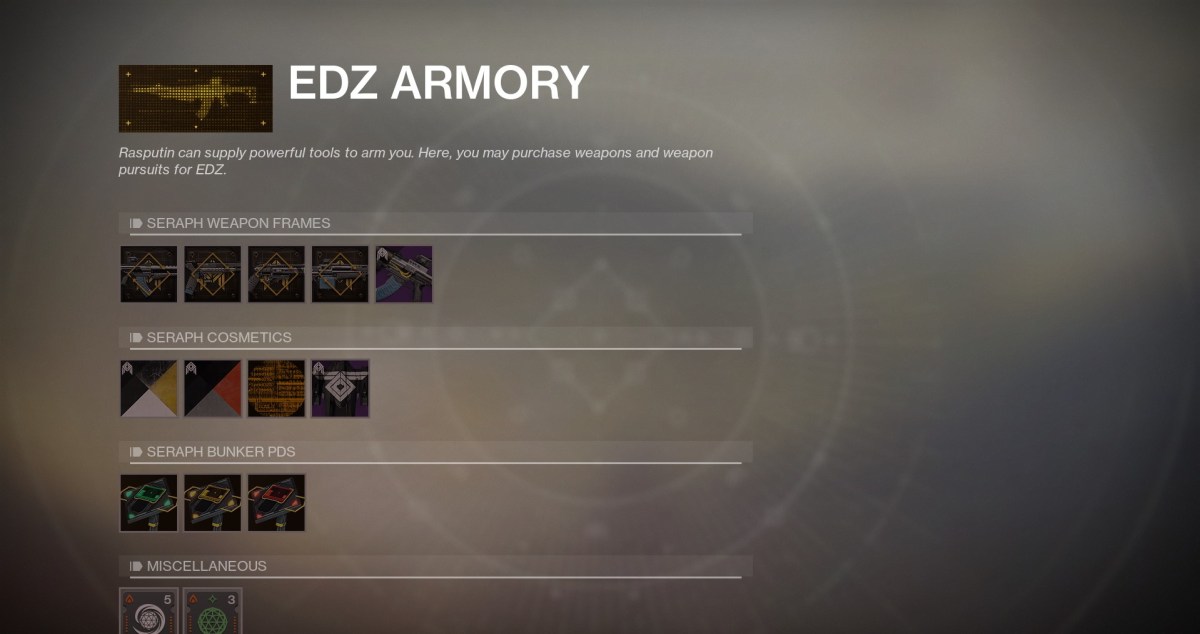
The first step of the quest is to complete the first series of bounties for the Seraph Warsat and provide the bunker with an upgrade. You need several chipsets to do this, which require warmind bits. You can earn these bits by completing bounties given to you by the Seraph Warsat bunker. To receive the chipsets, you need to provide the bunker with upgrades, which cost 90 warmind bits. You can choose to complete all seven level 1 upgrades, or mix and match as you see fit. Regardless, you will neven seven chipsets, which each requires 90 warmind bits. After that, you have finished the first task after you activate the first bunker’s bonus at the bottom.
Step 2 – Incident Response Plan
After completing the first task, the next thing you do is complete a weapon bounty for the Seraph Warset bunker. To acquire any of these, you need to raise the bunker’s level up to three, similar to how you built it to level one. After you do that, go to the bunker’s armory and choose any of the weapon bounties at the top. Complete the bounty, and then return to the Seraph Warsat bunker for the next step.
Step 3 – Relentlessly Upgraded
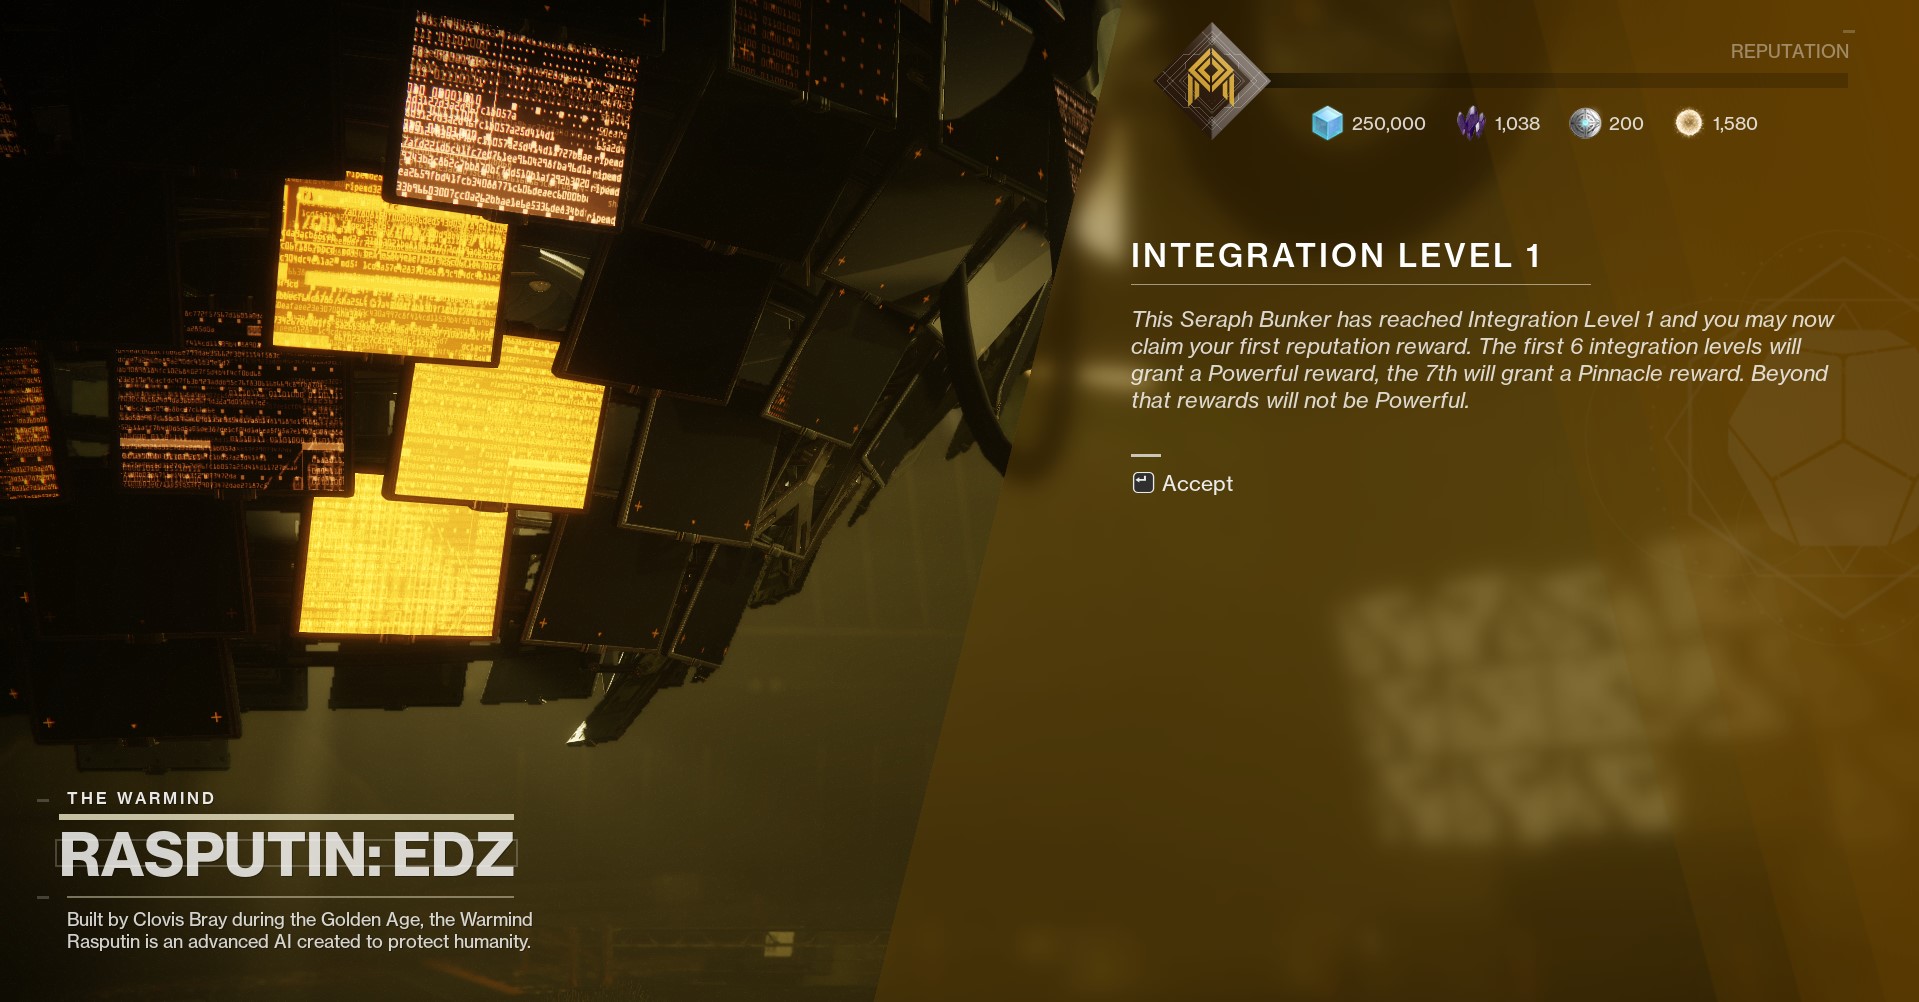
The next task needs you to upgrade a single bunker in the game completely. You need to claim all of the reputation buffs available at the bunker, and you can do this at any of the bunkers you unlock. To do it, you need to consistently grind out and complete the available bunkers found on it, systematically working your way through it to grab everything possible. It’s not an easy task, and it’s certainly time-consuming.
Step 4 – Recursive Function
This task is the same as the previous one, except you need to do it to a second bunker. By the end of this task, you should have two fully upgraded Seraph bunkers available to you. It’s going to take a lot of time to do this one, much like the previous task. Since you’ve done the first one before it, you should have no trouble repeating the process and having it down to an art at this point.
Step 5 – Fully Operational
You need to complete all of the upgrades for the final Seraph bunker in Destiny 2. It’s like step 3 and 4, honestly, so nothing new here, except it’s done for a brand new bunker. Season of the Worthy is truly turning out to be a massive grind, and players will feel it by the end.
Step 6 – Authentication Protocol
After completing the final Seraph bunker in the game, you now need to go and speak to Rasputin. You can do this after you’ve completed the final Seraph bunker’s upgrades, and you can go see how Rasputin will react to having all of these locations fully upgraded, giving it power once more.