Discord remains an incredibly reliable method of talking with familiar friends and like-minded people. Since its release, countless servers, each with its own purpose, have been created and some of them have gone on to amass thousands of unique users. Most of the time, however, people that use the popular social app prefer chatting with their friends on their own private Discord servers. If you’re looking to do the same, we can give you the steps you need to take to create your own server.
Related: How to make Discord show what game you’re playing
How do you create a Discord server?
To make a Discord server, navigate to the sidebar that contains the current list of servers you’ve already joined. You will then have to scroll down until you reach the circular node with a plus sign in the middle.
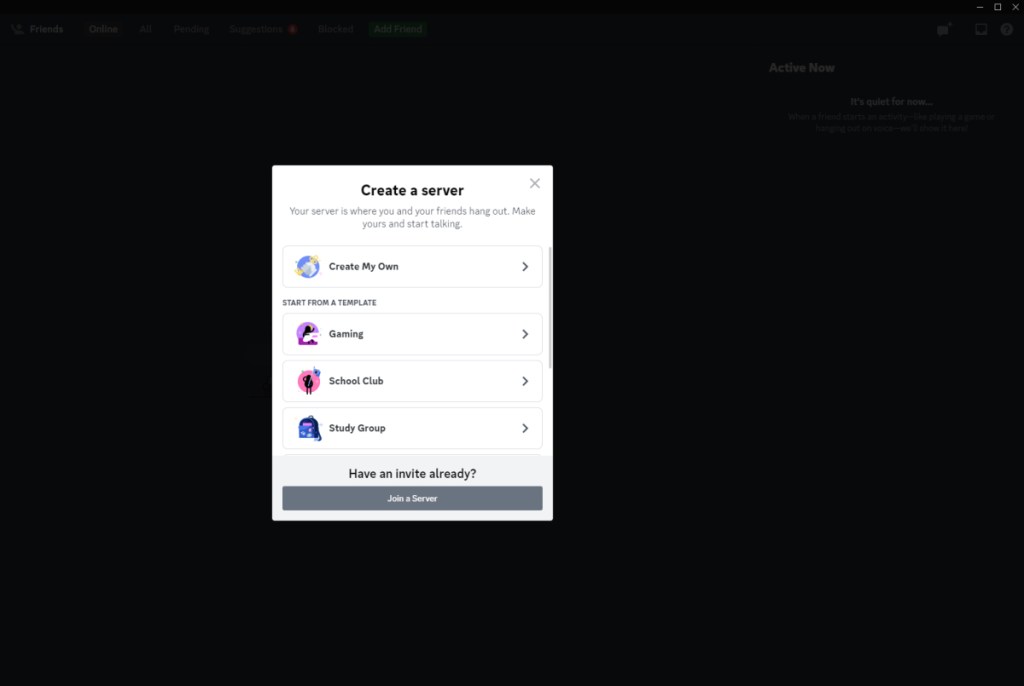
Once you’ve pressed this icon, you’ll be taken to the “Create Your Server” screen wherein you’ll be given a choice to either start your own server from scratch or choose from a variety of specifically themed server templates.
If you choose to create your own, you’ll initially be given a server that only has one text channel and one voice channel. However, you will easily be able to add more by simply pressing the plus buttons found beside each of the channel categories.
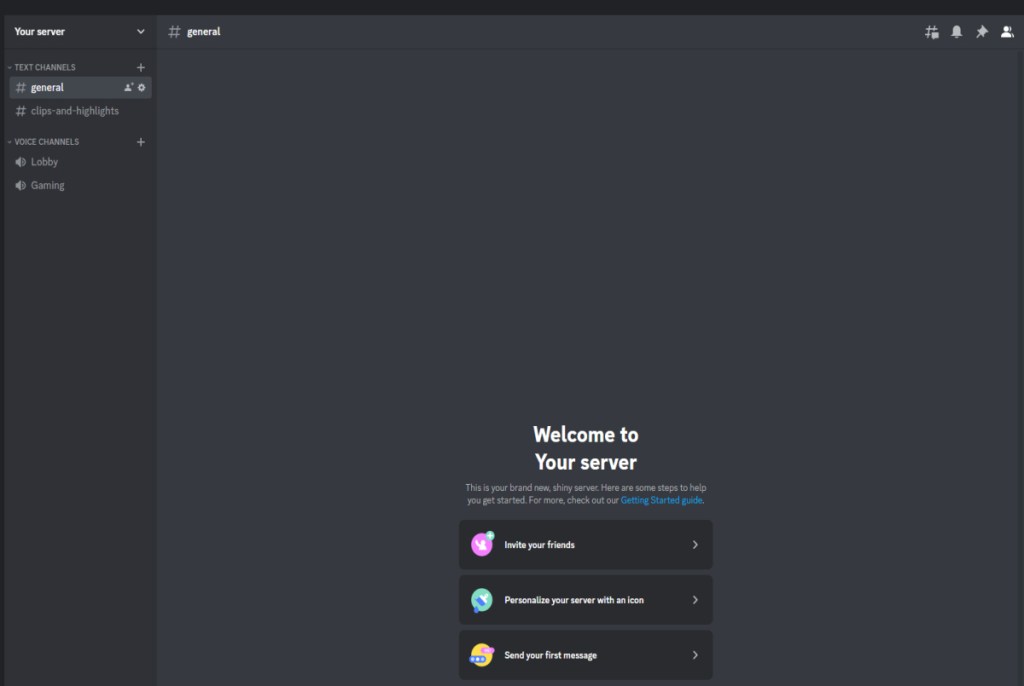
On the other hand, selecting a template will create a server that already has additional text and voice channels, each with its own specific purpose. For instance, if you choose the Gaming template, it will create a server that has an added clips-and-highlights text channel and a gaming voice channel.
Related: How to fix Discord Overlay not working
After you’ve made your decision, you will be given the option of creating the server for your friends or a community. The former will make it a private server while the latter makes it public. You can also choose to skip this option if you’re having trouble deciding.
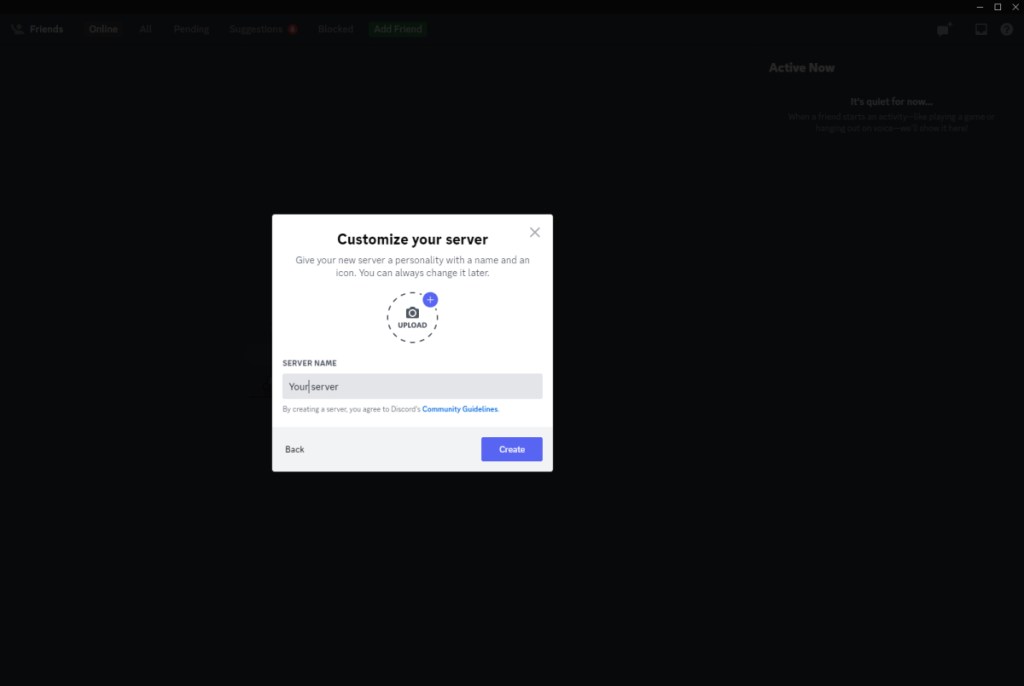
With your server type selected, you will finally be able to name and upload a photo for your own server. Keep in mind, though, that you’ll need to follow Discord’s community guidelines when picking out the name and image. Now that everything’s taken care of, all you need to do is start inviting friends.



Published: Jan 20, 2023 04:19 am